Before the arrival of the refrigerator, food was stored and kept fresh through the use of simple ice containers, most of which were tailored and utilised outdoors up against bodies of freshwater to keep them constantly chilled and refreshed. But later on, first of these storage units were loaded with snow during the winter season with later but very cleaver edition using chunks of ice transported down from the mountains. During 1748, first artificial structure of refrigeration was born by William Cullen from the University of Glasgow. Throughout the 19th Century, the evolution of cooling technology exploded. During the year of 1911, the first home refrigerators were being manufactured by General Electric selling for around $1,000’s nearly double the price of a car at the time. Up through the late 1920s a solution called ‘’ freon’’ was discovered by scientists. Unlike its predecessors, freon gas is colourless, odourless, non-flammable, noncorrosive, and best of all, nontoxic. The company patented the substance and General Motors and DuPont began freon production during 1930’s under the new brand, Kinetic Chemical and the rest is history.
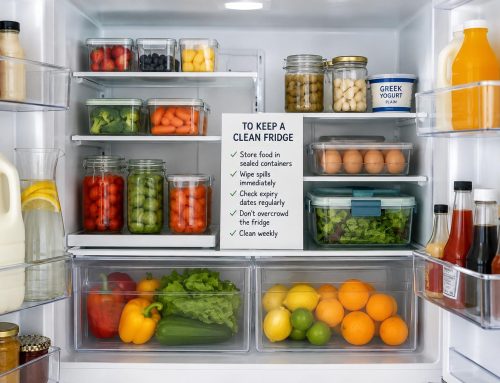
Tip: Remember refrigerators must remain clean to be safe; even at temperatures at the most acceptable levels of 35 degrees Fahrenheit, bacteria can emerge and contaminate all food we do keep inside. If you avoid cleaning your fridge, it will accumulate lot of bacteria and germs, that will create un-safe environment for our household food reserves. If you need professional cleaning company like CCL Cleaners to help get in touch, alternatively simply follow the steps.
Interior cleaning of the fridge
Cleaning and sanitising home fridge is an enormous task that most of us dislike, but believe me it is huge deal for a distinct purpose. In a washed down and clean fridge food last longer, the fridge also works properly and it is energy sufficient. Prepare for a half an hour at least if you have in mind to do deep washing inside and out the house fridge. Meanwhile you can prepare these in advance:
Here is the recipe how our end of tenancy cleaning teams participates in the following highest quality step by step procedures for ultimate fridge washing and sanitising:
Actual cleaning
Bring into action your cleaning tools. Very important is to use natural cleaning products, remember heavy duty detergents might contaminate your food. For this reason, use of baking soda is your best way of cleaning the fridge as it doesn’t include abrasive particles but absorbs any smells. Dilute a white vinegar after the baking soda run, mainly as a back-up for better results. Also, prepare yourself with a variety of microfibre cloths, some dipped in advance in clean hot water, and some left dry. An old toothbrush will be helpful as well, that’s because you will need to rub and at some point, to get to places where you cannot reach with hand.
Tip: Periodical clean once in every 2 weeks is recommended. You can do this by using a mixture of 1/3 cup baking soda in lukewarm water to clean all interior surfaces, plus a basic sponge or scour to wash up syrupy spillages that you neglected during busy days of the week.
Exterior cleaning of the fridge
This task must begin from the top and work down. Most of the soot on the outside of the fridge is accumulated grease (only the top gets dusty), so a grease-dissolving remedies obviously will do the job.
Bicarbonate soda is the better of the two, as it does not leave a streaky residue as soap does. Pay extra consideration fridge door handles; scrub off mildly excess grime with soapy water, follow up with disinfectant then dry up with clean cloth or paper towel. Finish off ultimately by drying the outside surface extensively.
Cleaning freezer and parts
Over time ice will build up inside the freezer. The space to store the food will become limited if you are dawdling not cleaning it up. At certain point the accumulation of ice will be remarkable that you won’t be able to close its door.
Required fundamental cleaning equipment:
Step1: is to switch the fridge off and open the door. Remove all the frozen products from the freezer, put it into the insulated thermal picnic box, and shut the lid, so it doesn’t defrost. If you have other stuff that needs to be taken out from freezer, fold it up securely, first in a few lists of newspaper to ingest any liquid, then wrap it up in blankets as insulation. Place all this into a cool or shady place like balcony if you live in a flat or garage if you live in a house.
Step2: start defrost the accumulated ice. For that reason, you will need to be careful with your floors. If it is wooden you have positioned a lot of towels at the bottom of the freezer to capture any drips, so melting will be contained and your kitchen floor will be safe. If you plan to accelerate the process, place a bowl or two with boiling water inside freezer and next shut the door. You will still need to wait for the thing to do their work. Melting of the ice will take its time and while wait you can focus on other household chores.
Step3: is to put on rigger gloves and use the plastic spatula to eliminate ice from the side of the freezer. Bear in mind not to scratch the inside surface of the compartment.
Step4: pick up chunks of ice and put them in the empty bucket. When the bucket is full, take it and place it in the sink, where it will melt on its own.
Step5: Once ice is out, clean inside surface of the freezer walls. The soapy water work effectively for the walls, if needed using the soft scrubbing brush.
Step6: Rinse down baking soda and any soap water residue with fresh water and remove the soaked towels.
Step7: Dry up interior walls with dry clean cloth and then store the food back inside.
Tip: Attempting to clean fridge at least couple of times per month is greatly beneficial for the fridge itself and for health and safety. Food with no grown bacteria on it.